Spitting good Hummus
This post contains an admission, an admonishment and for those patient enough to get to the end, a recipe for fabulous hummus.
My whole life I never liked hummus. This despite growing up in a respectable Jewish family (one could be forgiven for thinking that Jewish culture is ALL about food) with a food loving father who actually lived in Israel. So when I moved to New York I was somewhat dismayed to find that, along with bagels and lox, the kosher deli and liberal use of yiddish expletives, hummus was everywhere.
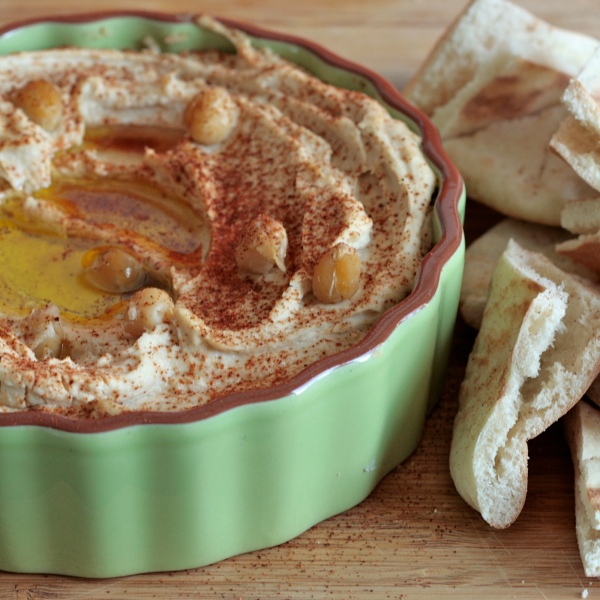
It was, therefore, a revelation, to discover that while I found supermarket hummus a bland and boring slurry, freshly made hummus is comforting, delicious, and even good for you. I have my sister to thank for dragging me to a hummuseria last year and insisting that I give the chickpea spread another try. Real hummus is made mostly with chickpeas and tahini (and not red peppers or eggplants or artichokes) and is served slightly warm, with lashings of good olive oil accompanied by fresh pita bread and perhaps some olives or a boiled egg. If you have never had this kind of hummus I really recommend you give it a try: you’ll find that it compares favorably to what you’ve been used to, in much the same way that wine compares favorably to water or that chocolate cake surpasses dirt.
If you are going to start making and eating authentic middle eastern hummus then I urge you to go one step further and start to pronounce hummus with a gutteral ‘h’… I think you will find this proper pronunciation will make the dish taste more authentic. Certainly, I’ll consider it a personal favor to have you join me in my fight to stop pronouncing hummus as homonymous with humus (that nutrient rich soil which one hopes to plant food in but never eat). If pronouncing that guttural sound is hard for you, remember, its ‘ch’ as in the Scottish loch (picture yourself in a wee kilt), or if that doesn’t help you, just make as if you are going to spit!
When making homemade hummus the most time consuming part is cooking the chickpeas – the addition of baking soda does help with this, but, in a pinch, making your own hummus using canned chickpeas, while not the real deal, is still infinitely tastier than store bought.
Hummus
- 2 ½ cups dried chickpeas (or about 5 cups canned)
- 1½ Tsp baking soda soda (if cooking your own)
- 1 ¼ cups tahini
- Juice of 1 lemon (or more, to taste)
- 6 cloves garlic, crushed (or more, to taste)
- Salt
- Olive oil
- Paprika
- 3 eggs, hard-boiled, roughly chopped (to garnish, optional)
In a large bowl add 1 Tbs of baking soda to 5 cups of water and soak the chickpeas overnight
Drain and rinse the chickpeas then place in a medium saucepan with the remaining baking soda, covered with double their volume of cold water. Bring to the boil, then turn down the heat and simmer gently for 2-3 hours, until tender. Add more water if necessary to keep them covered throughout.
Drain well, reserving the cooking liquid, and setting aside a few chickpeas as a garnish. In a food processor blend the chickpeas with the tahini, lemon juice, garlic and salt adding enough cooled cooking liquid to make a loose paste.
Serve warm, with plenty of olive oil swirled on top, a sprinkling of paprika, and the egg, if using, on the side.
Chocolate croissants
Despite posting much less often than we used to, I still come visit innBrooklyn pretty frequently and check in to see who has been visiting us and why…. its fun to see what searches bring people over here. For your edification, or amusement: the most popular searches linking to innBrooklyn are:
- at number four, searches for ‘blue porn’ — where the searcher is destined to be sadly disappointed to find only mouth watering food photos from Blue Hill at Stone Barns.
- at number three: those seeking salve for the pain of dating in NYC (I know, believe me, I feel for you … but don’t look here for help, that post was all about my granny Bessie’s recipe for date cookies);
- at number two: home made instant pancake mix (people like convenience foods, even those they have to prepare themselves).
- and, finally, the most searched for item on innBrooklyn is croissants… we get searches for these from all over the world coming in as: rohlík, kroasan, κρουασαν, קרואסון, кифла ,كرواسون, ay çöreği ,kifla. I love to see these listed in our dashboard, it really illustrates the amazing connected world the internet has opened up: and I like to picture the person over in Kiev or Tel Aviv busy rolling out layers of buttery dough from the recipe they found on innBrooklyn!
My only regret is that our croissant post was a very early post, and the photo is just not up to scratch. I hate to think that the readers in Istanbul and Minsk will be denied some of Noerah’s beautiful photography! Fortunately, plain butter croissants are just the beginning of my love affair with layers of pastry and butter… I also adore the ‘pain au chocolate’ and recently baked up a batch using a new recipe from Peter Reinhart’s ‘Artisan Bread’s Every Day‘. I’m not sure why I decided to try this recipe instead of the epicurious recipe I usually use: but I was glad I did. Reinhart uses a process that incorporates some cold/slow fermentation (the secret behind the no knead bread) which meant the dough could be refrigerated for a few days before all the rolling begins. His rolling/folding process also seemed a little less time consuming. I did revert to my Epicurious recipe for the final shaping of the chocolate croissants as that recipe made more, albeit, smaller, croissants which I thought might force me to eat less (alas, no!)
Making croissants is not really difficult but it is somewhat time consuming (if you see a recipe for ‘quick croissants’ don’t believe it!). The basic premise is that you make a dough, make a butter block and then use a technique where you sandwich the butter between layers of dough which you then roll and fold continuously so that you get a number of layers (about 81!).
When the croissants bake the butter melts and creates air pockets which expand leaving you with a soft, rich, flaky pastry! In the interests of keeping this post to a manageable length I am not going to retype the recipes I use. You can find Reinharts croissant recipe here. And Epicurious has good instructions for the final shaping of the pain au chocolate. Also, after much searching, I found the best place to buy the chocolate batons to be King Arthur flour (It really is worth buying these: trust me, I’ve done it both ways!)
My final word of advice: don’t eat them all yourself!
Fleeting craftroom color
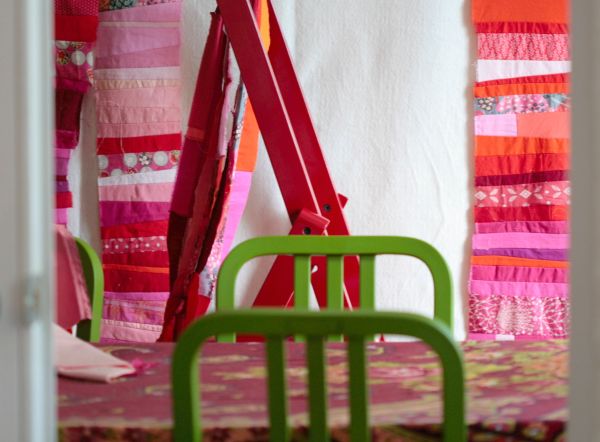
I’ve been working on a new quilt (only my second attempt ever) for ages and aaages and aaaaaaaaaaaaaaaaages!
I want something that will work in my room with the glorious art work I have hanging above the bed by my friend, the talented Galia Gluckman. I bought a great selection of pink and orange fabrics from my favourite fabric store: Purl Soho and I set myself some unrealistic goals (who knew that a queen size quilt was so much bigger than a baby quilt?).
Recently I hung the unfinished pieces on the wall in my craft/ dining room so I could start to get a sense of how it might all come together and Noerah snapped this fun photo of the room, complete with recycled Emeco dining chairs (made from 111 recycled soda bottles) and bright red step ladder. t all looks pretty, if VERY incomplete: I wonder how many years I’ll be living with this unfinished project for?!
I love garlic, and use it liberally when i cook: just a clove or two can impart so much flavor. Its also good for you– it often comes up on lists of super foods (although sometimes I think ever fruit, vegetable and herb is given a super hero cape to try on at some point). I’ve seen it said that garlic stimulates immunity, is more powerful than penicillin and is anti carcinogenic. And if you aren’t sure if you believe all that… well we all know about its use as an anti-vampire weapon: something I really appreciate, since, despite my love of most things fantasy and science fiction, I do NOT like vampires! The one thing I am sorry to report garlic does not appear to be good for is keeping mosquitos at bay — despite many claims that it can be used in this way, it appears that the claim does not hold up in actual scientific testing — nor does this garlic tart prevent me from returning home from the park studded with itchy little bites!
Anyway… thats a long introduction all of which is just to say: I LOVE GARLIC!
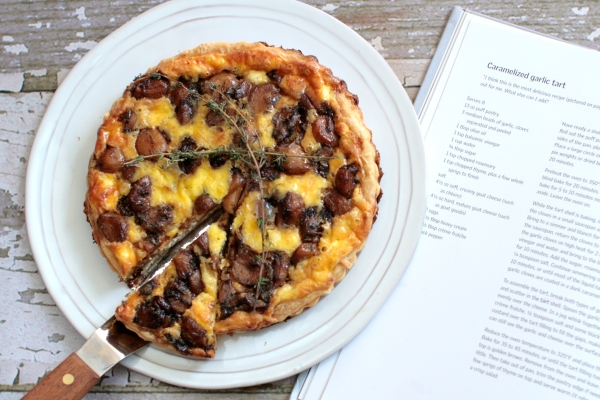
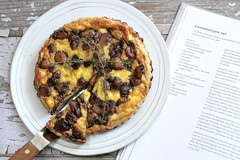
So when I first read this Caramelized Garlic Tart recipe in Yotam Ottolenghi’s Plenty (a book I’ve raved about before) I had one of those Aha! moments and immediately wondered why I hadn’t thought of this before. Baking garlic renders it sweet (I have one of those little terracotta garlic bakers which make preparing a whole garlic super easy, and I can easily sit and squeeze clove after clove onto some baguette until the whole thing is gone!). And I know all about caramelizing it’s cousin the onion… so it made perfect sense that caramelized garlic would be delicious. And it is! The recipe calls for a filling of only garlic and cheese, which keeps the flavor really intense. When I made it the second time I actually halved the goat cheese and added more garlic as I found the cheese flavor had slightly overwhelmed the more subtle intensity of the garlic. I highly recommend making an additional portion of the garlic filling, too: it will keep in a jar in the fridge and is great on a slice of toast.
Ingredients
- 13 0z puff pastry
- 4 whole heads garlic
- 1 Tbs olive oil
- 1 tsp balsamic vinegar
- 1 cup water
- ¾ Tbs sugar
- 1 tsp chopped rosemary
- 1 tsp chopped thyme, plus a few whole sprigs to finish
- salt and pepper
- 2 1/2 oz soft, creamy goat’s cheese (or up to 4 1/2 but use a mild cheese)
- 4 1/2 oz hard, mature goat’s cheese (like goat gouda)
- 2 free-range eggs
- 6 1/2 Tbs heavy cream
- 6 1/2 Tbs crème fraîche
Roll out the pastry into a circle that will line the bottom and sides of a shallow, loose-bottomed, 11″ fluted tart tin. Line the tin with pastry, lining the sides of the tin, too a little above the top. Place a circle of greaseproof paper on the bottom and fill with pie weights (or baking beans) Leave to rest in the fridge for 20 minutes.
Preheat the oven to 350F and blind-bake the case for 20 minutes, remove the beans and paper, and bake for five to 10 minutes more, until golden. Set aside.
Meanwhile, make the caramelized garlic. Separate and peel all the cloves, put them in a small pan and cover with water. Bring to a simmer, blanch for three minutes and drain. Dry the pan, return the garlic to it along with the oil and fry on a high heat for two minutes. Add the vinegar and water, bring to a boil, then simmer gently for 10 minutes. Add the sugar, chopped herbs and a quarter-teaspoon of salt, and continue to simmer for 10 minutes, until most of the liquid has evaporated and the cloves are coated in a dark syrup. Set aside.
Break the goat’s cheeses into pieces and scatter in the tart case. Spoon the garlic and syrup evenly over the cheese. Whisk the eggs, creams, half a teaspoon of salt and some black pepper, then pour over the garlic mix, filling any gaps and making sure the garlic and cheese peep over the top.
Turn the oven to 325F and bake the tart for 35–45 minutes, until the filling has set and the top is golden brown. Remove from the oven and leave to cool a little. Take the tart out of its tin, lay a few sprigs of thyme on top and enjoy!
All about ioby
A few weeks ago Noerah and I sat down for a cup of tea and a chat with Erin Barnes, co-founder of a fabulous crowd sourcing website focused on local, sustainable, environmentally conscious projects. Ioby, – in our back yards – is all about building community and knowing that small changes can make a difference. The site works primarily by helping small local projects find funding and volunteers, but is also a shared resource for inspiration and education.
For so many people in what Erin calls the “post Inconvenient Truth era”, the knowledge of global warming is a constant concern. Corporations take advantage of our fear and guilt by offering us greenwashed products which do little, if anything, to really address the problem. Erin characterized ioby as an antidote, a meaningful solution that could connect people locally and encourage them to do and learn something; and yet which is just as easy and immediate as shopping online!
So… how does it really work?
Anyone can set up and lead an ioby project by completing a profile page defining the environmental problem and the proposed solution (before going live each project is reviewed to make sure it fits with ioby’s community and not for profit standards). Sometimes largish, well established organizations use ioby to connect with new supporters; but many of the projects are very small scale: community gardens, compost and chicken coops, urban farms in empty lots, teen bike repair education, play areas for kids… By partnering with ioby even the smallest of these projects can receive tax deductible donations, a huge benefit for your block association’s daffodil campaign.
To take the photos on this post, Noerah visited the beautiful community garden maintained by landscape architect and volunteer Ross Martin which hosts ioby project Children’s Organic Food Patch and features unique artwork along the fence, upcycled from trash by artist Rolando Politi, made of recycled material and trash.
To get a sense of the breadth of projects, and to find some hidden gems, we asked Erin about some of her favorites:
The self professed ‘water nerd’ immediately told us about: ‘Don’t Flush Me‘ – a system of sensors in the NYC sewer system that notifies users when the city’s combined sewer system, overtaxed during a storm, cannot cope with the additional burden of human waste.
She also waxed enthusiastic about 596 Acres: an education project that provides Brooklyn communities with information on all the empty lots in the borough providing a starting point to reclaiming this vacant land as a green resource.
Of course I also wanted to hear about food projects, and Erin mentioned Allergic to Salad: a program that teaches kids to cook, by getting them to have fun doing so, tricks them into healthy eating!
These are, of course, just a fraction of the projects active on ioby at any time… we talked about a whole lot more, and then I spent a long time online exploring the projects in my neighborhood. Indeed, one of my favorite features is the ‘map view’ – which allows you to see all the projects that are, really, in your back yard. It was exciting and inspiring to see how much is going on within a short bike ride of my house.
I hope you’ll take some time to explore ioby too… the most exciting news for our far flung innBrooklyn readership is that ioby, which for many years was in New York City only, has now launched nationally. We so hope you some of you will participate in, or even lead a project in your back yard… We’d love to hear about any ideas you have for ioby projects: and if you decide to participate please let us know!

Just joists
Today I was on site at a job that is under demolition as the contractor gets the old brownstone ready for an interior facelift. The building is well over 100 years old and there are hints of stories everywhere you look. We found bits of old newspapers, an ancient cigarette pack (sans health warning labels) and a few patches of old silk wallpaper over several layers of crumbling paint and plaster. Everywhere gas lines snake, now offering just a lingering threat of explosion where once they would have provided fuel for the house lighting. Further evidence of ‘modernization’ is provided where the shaft of the old dumb waiter has been filled in with what was once the latest in plumbing conveniences (now rusted and leaking). One of my favorite finds is the hidden doorway between adjacent buildings which allowed craftsman to develop whole rows of houses at once.
Not all the old stories are good ones, in this case we were meeting to review damage to floor framing, charred in some long ago fire. As we balanced precariously on the exposed joists we wondered what had caused the fire, and when, and we marveled at how the house had continued to stand for so long with its very bones half crumbled away. As we planned how to make the old building sound again I felt good knowing we would not only repair the building, but also that the old joists would be reincarnated in some beautiful furniture.
Braude Pankiewicz Architects have designed a number of beautiful, simple furniture pieces that highlight the beauty and history of the wood salvaged from old brownstone demolitions. The natural edges of the bench are retained to highlight the original beauty of the wood, which is offset by the bold and simple lines of the blackened steel support. It feels great to find ways to reuse the materials from our job-sites. And I’m hoping to have a joist table of my own some day soon… you’ll know I do if you start to see photos of food being served on a reclaimed wood dining table here on innBrooklyn.
The amazing X-fruit
I’ve always thought banana’s were amazing (and delicious). As a kid I once wrote a poem for school about how they came in their own packaging with a quick release opening mechanism. (I guess I was a food nerd even then…) I really wish I could find a copy of that writing: I’m sure it would be ridiculous and amusing!
I’ve since learned a lot more about bananas, and they have a really intriguing story. The bananas we eat are a seedless mutation of the wild banana, and, being seedless, are unable to propagate. Which means that all the edible bananas are essentially cloned from the original mutant stock. These X-fruit are, unfortunately, particularly susceptible to disease since, if something comes along that can kill one plant, the genetic uniformity mean all the others are susceptible as well. I understand that the Cavendish bananas we eat today are a replacement of a far tastier Gros Michel banana, which got largely wiped out by disease.
Another interesting factoid is that almost all bananas are picked and shipped green and then ripened in special rooms, where ethylene gas is used to artificially ripen the fruit. As with other produce, they taste much better tree ripened but this almost never happens in our world of industrial food distribution. The bananas I buy at the Green Hill food coop are Equal Exchange bananas, fair trade farmed by small cooperatives in Ecuador and Peru. I swear they taste better too!
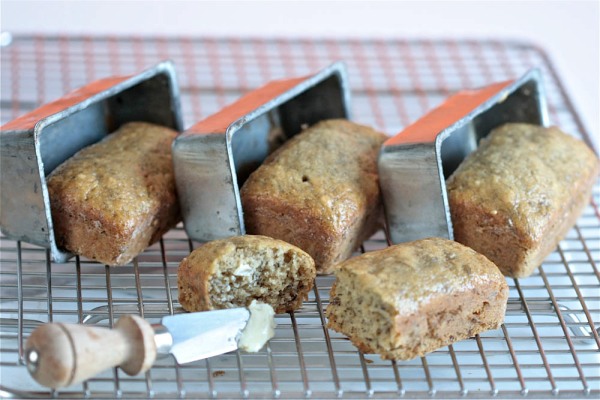
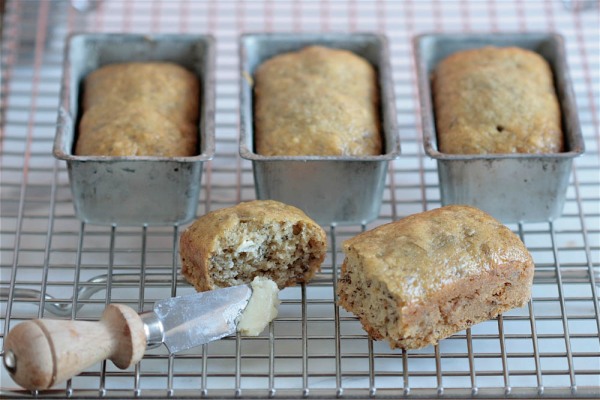
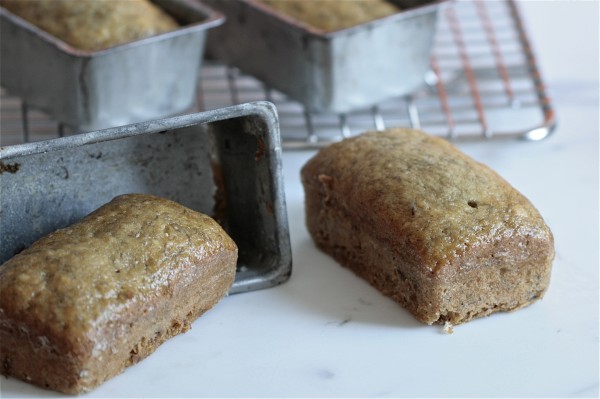
Anyway: perhaps my fascination with this fabulous fruit has led me to occasionally purchase more than I could eat, and so sometimes I land up with a banana that has moved well beyond ripe and into blackness. Fortunately overripe bananas are a veritable invitation to make banana bread and I have a recipe I adapted to be used with just one banana (though it doubles and triples easily).
One Banana Bread
- 1/2 cup all-purpose flour
- 1/2 teaspoons baking soda
- generous pinch of cinnamon
- generous pinch of teaspoon salt
- 1 medium egg
- 1/3 cup sugar
- 2 1/2 Tbs vegetable oil
- 1 large mashed over-ripe banana
- 1 Tbs sour cream
- 1/2 tsp vanilla
- 1/3 cups walnuts (optional)
- 1/3 cup chocolate chips (optional)
Preheat oven to 350°F. Butter and flour four mini loaf pans, or muffin tins.
Sift the flour, baking soda, cinnamon, and salt into a bowl. In a separate bowl beat the eggs and sugar at medium-high speed until very thick and pale and mixture forms a ribbon when beater is lifted, about 10 minutes. Add the oil one tablespoon at a time, mixing, then mix in the banana, sour cream, and vanilla. Finally fold in the flour mixture by hand as well as the walnuts and chocolate chips if you are using them.
Divide the batter evenly between pans, and bake in middle of oven until golden brown and a wooden pick or skewer comes out clean, approx 3/4 hours.
Grease glorious grease!
On most Thursday evenings you can find me somewhere in Dumbo, Brooklyn covering myself in grease.
I spend the first part of the evening ‘volunteering’ at Recycle a Bicycle. (That’s volunteering in quotation marks because I’ve got so much to learn about bicycle maintenance that I am able to make only minor useful contributions, while spending most of my time learning from the very generous crowd of more experienced folk who come to share their time and knowledge). Still, after about 5 months of more or less regular wrenching, I do find myself assimilating some knowledge and last week was able to fix and adjust the breaks on my lovely Dahon Mu all by my big-girl self! Its a great organization and a fun night out: you can see more about it in this video made by fellow volunteer Roy Blumenfeld (watch carefully for a chance to see me with my hands positively coated in glorious grease!)
Having done our best to scrub most of the grime off our hands we generally head out to Rebar for beers. And there I find myself dipping my hands into buckets of greasy goodness once again. Rebar offers a mix and match popcorn menu where you choose a ‘fat’ (olive oil, butter, smoked bacon, and duckfat) and a ‘powder’ (garlic, paprika and cheese) to create the most addictive version of this humble snack imaginable. I’m totally besotted with the duckfat and garlic version and so, of course, I found myself unable to resist experimenting with uber popcorn at home
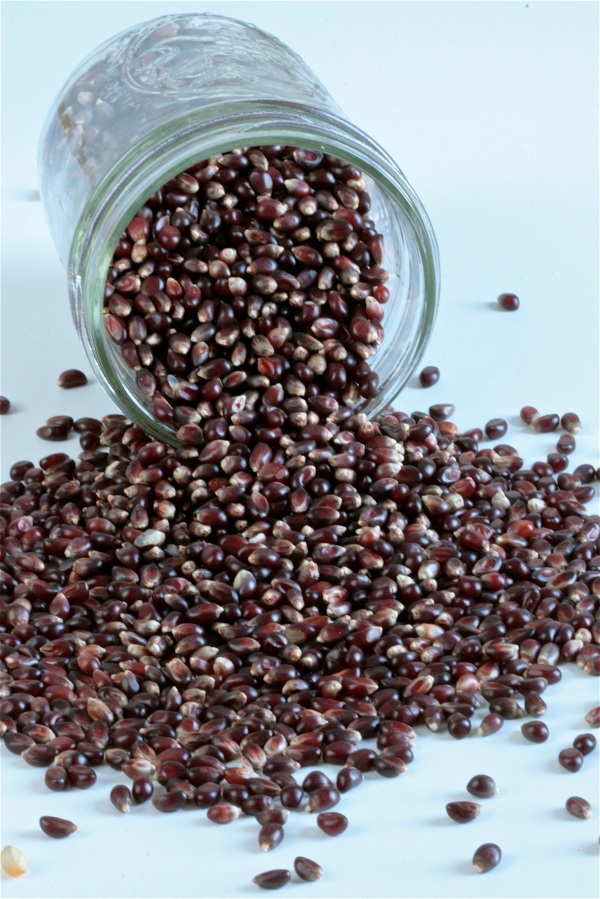
Making popcorn is super easy. So easy that I simply cannot comprehend the need for the ‘microwave popcorn’ shortcut (which serves a side of carcinogen from the coating of the bag with your snack). First: purchase some good kernels: I really like the Rancho Gordo Crimson Popping corn whose beautiful jewel like kernels burst into the brightest white puffs, and taste more essentially popcorn-y (Noerah says they are the flavor of popcorn she grew up with). Next, I use the steps from this recipe to get the kernels popping. But beyond the basics, the key to creating Rebar worthy popcorn is playing with various flavor combinations — I highly recommend trying any of the following:
- really good olive oil (I bought some L’Estornell Organic Arbequina olive oil to make Olive Oil Ice Cream and it is magnificent – a powerful aphrodisiac even, and something I’ve been known to drink, albeit just little sips at a time!)
- animal fat (goose/duck/bacon!)
- assorted salts (Atlantic Mesquite smoked finishing salt, anyone?)
- spices (chili powder if you want to kick it up a notch)
- parmesan or other cheese
And there it is: you are ready to host your own greasy Thursday evening volunteer night – though I won’t hold it against you if you chose to watch bad TV and gorge yourself instead (that my Friday night favorite activity, lets be honest!)
Plenty of Plenty
I try to think about what I eat, to choose food that is sustainable and healthy, but too often good intentions get swept aside and I land up making (or buying) whatever it is I’m craving – and frequently that lands up including either meat or chocolate (and very occasionally both simultaneously).
Fortunately, some friend’s recently introduced me to a cookbook that has left me drooling over vegetables. Its a pleasant change to be cooking vegetables for the sheer love of the flavors and not because I’ve shamed myself into it! If it wasn’t so passé I’d consider cooking my way through the entire collection (OK, OK – I mostly don’t want to sign up for that and then fail to complete the exercise, I have enough unfinished projects lurking around my home these days). The book is Yotam Ottolenghi’s Plenty and I highly recommend it – the photographs are inspiring and the recipes, while easy enough that you’ll want to make lots of them, are special enough to be worth the effort. You can also find a great collection of Ottolenghi’s recipes online.
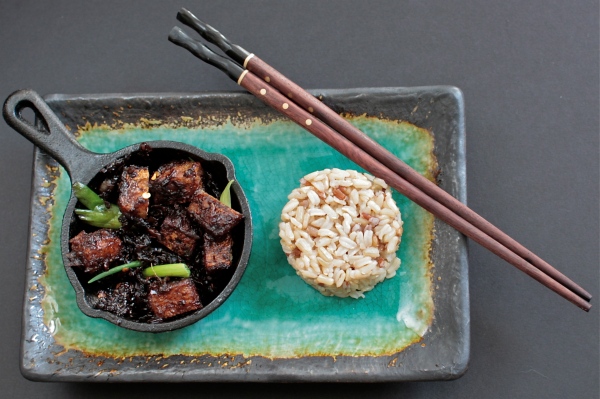
I started by making his Black Pepper Tofu – an asian inspired dish that packs plenty of heat from both chili’s and black pepper, and that I served with rice. The only change I made was to use chili flakes instead of chopped fresh chili’s (I really don’t love working with fresh chili, I always manage to wipe some in my eyes!). I really love this sauce and am planning to make it a second time this weekend substituting eggplant for half of the tofu – I’ll let you know how that goes.
Inside planters: take two
For some reason I am generally unable to grow plants indoors. I once killed a cactus because I forgot to water it often enough, and lets be honest, they don’t require an excess of hydration. Outdoors I manage OK (right now my tomato plants are doing magnificently, even if I don’t say to-may-toe).
Anyway, despite my brown thumb with houseplants, a while back I bought these beautiful upside down Boskke planters – I thought that having such gorgeous vessels would make me more attentive to their contents. (Also, in addition to looking good they have a water reservoir that means they need less frequent care) I went out and filled with various herbs and vegetables, and a surfeit of optimism – all of which wilted and died (including my confidence). It was very upsetting. This year I got suggestions from my local garden supply store and decided to plant some decorative plants that are known to thrive without the need for too much water! So far they are doing great, I’m particularly pleased that my orchid is still flowering. And its cool to watch the plants fighting gravity to grow up the right way to the light.
